Introduction
A DIY robot costume is a timeless Halloween favorite that combines creativity, resourcefulness, and a dash of futuristic flair. Whether you’re dressing up a child, a teen, or even yourself, transforming cardboard boxes and everyday household items into a robot masterpiece is both affordable and rewarding. This guide will walk you through everything from essential materials to advanced customization, ensuring your creation stands out at any event. Drawing inspiration from recycled materials, glowing LEDs, and imaginative designs, this article synthesizes tips from top DIY enthusiasts and crafters 269. Let’s dive into the nuts, bolts, and sparkly details of building your own robot costume!
Essential Materials for Your Robot Costume
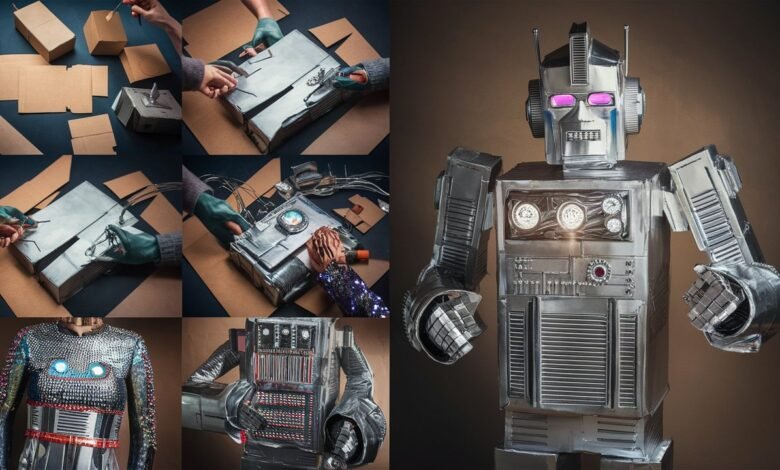
The foundation of any robot costume lies in its materials. Start with cardboard boxes—one large for the body and a smaller one for the head. These can be sourced from delivery packages or appliance stores. Flexible aluminum ducting (for arms and legs) adds a metallic, industrial look, while Duck Tape® or metallic laminate provides a sleek finish 239.
For detailing, raid your recycling bin: bottle caps, computer parts, CDs, and plastic containers make perfect buttons, gauges, and control panels. Don’t forget silver spray paint for that classic chrome aesthetic. To elevate the design, incorporate LED lights, glow-in-the-dark tape, or battery-powered string lights for a futuristic glow 579.
Step-by-Step Construction: Building the Robot Body
1. Cutting and Reinforcing the Box
Begin by sizing the cardboard box to fit the wearer. Use a box cutter to remove the bottom flaps of the body box, leaving the top open for easy entry. Reinforce the seams with masking tape or Duck Tape® to prevent collapse. Cut armholes and a head hole, adjusting their placement based on the wearer’s comfort—this step is crucial for mobility 279.
2. Adding Structural Elements
Attach flexible aluminum ducts to the armholes using hot glue or tape, creating articulated limbs. For legs, slip ducting over pants or secure shorter pieces to the box’s sides. To mimic “jet packs,” glue painted soda bottles or foam tubes to the back 28.
Designing the Robot Head: Form Meets Function
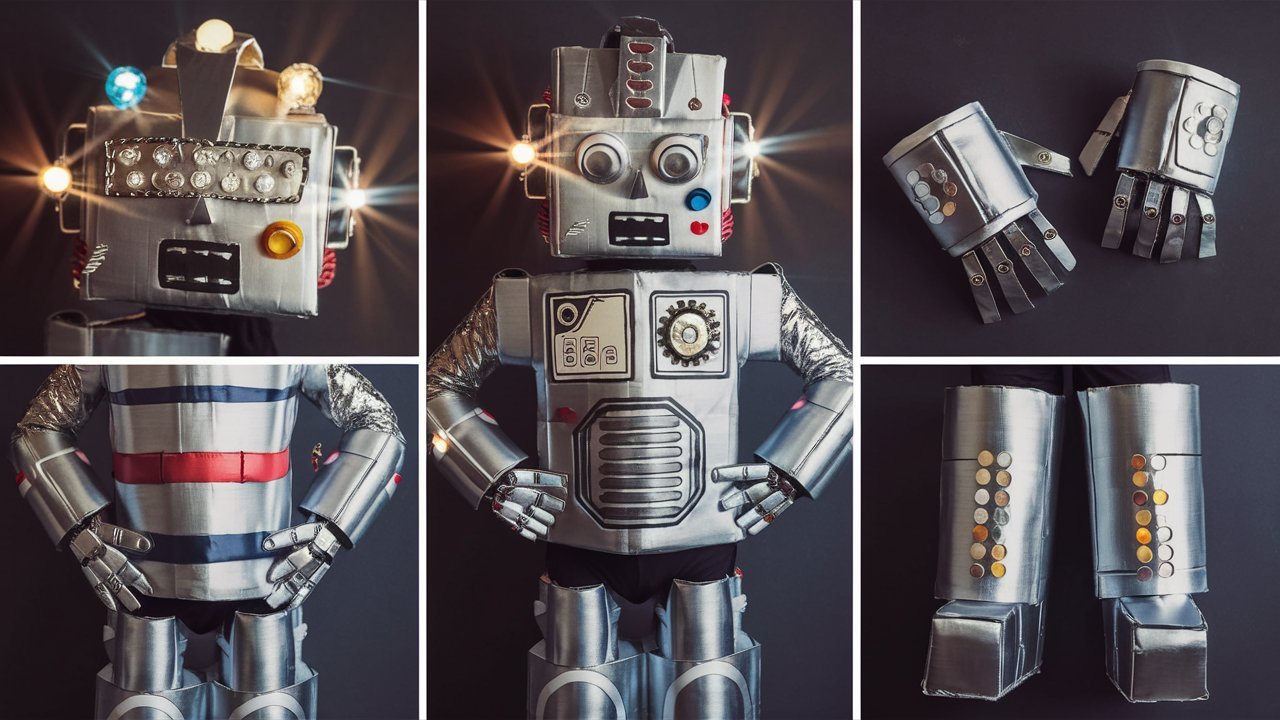
The headpiece is the costume’s centerpiece. Start with a smaller box, cutting a face hole and lining the edges with soft fabric to prevent irritation. For antennas, attach slinkies, pipe cleaners, or glow sticks to the top. Add “eyes” using LED push lights or painted bottle caps, and don’t shy away from quirky details like old bike helmet parts or repurposed kitchen tiles 289.
Pro Tip: If visibility is an issue, cut a mouth hole and line it with mesh screen for breathability 9.
Creative Customization: Making Your Robot Unique
1. Themed Designs
Channel popular robots like Optimus Prime or WALL-E by incorporating color-blocked duct tape, foam armor, or 3D-printed accessories. For a “Mech” robot, use black and red foam sheets to create segmented armor plates 68.
2. Light-Up Features
Embed LEDs into control panels or antenna balls for a glowing effect. Use conductive thread to wire small lights to a hidden battery pack, or opt for pre-made light strings 59.
3. Recycled Tech Aesthetics
Glue old computer keyboards, circuit boards, or DVD parts to the chest for a “high-tech” look. Print and laminate faux gauges or dials to mimic a robot’s interface 26.
Safety and Comfort Considerations
A great costume shouldn’t sacrifice comfort. Ensure the box isn’t too heavy—opt for lightweight cardboard and avoid overloading with decorations. Test mobility by having the wearer walk, sit, and reach for candy. For younger kids, skip the headpiece and use silver face paint instead 79.
Always supervise hot glue gun use, and sand down sharp edges on ducts or cardboard. If using lights, secure batteries away from the wearer’s skin to prevent overheating 79.
Frequently Asked Questions
1. How do I keep the robot head from falling off?
Use adjustable straps inside the headpiece, or attach the box to a bike helmet for stability. For lighter options, craft a headband with antennas instead 29.
2. Can adults wear these costumes?
Absolutely! Scale up the box size and reinforce joints with extra tape. Add humorous details like a “coffee gauge” or “dad bot” label 26.
3. How long does it take to make a robot costume?
Simple designs take 4–6 hours, while intricate builds with lights or armor may require a weekend. Start early to avoid last-minute stress 68.
4. Are there alternatives to cardboard?
Try EVA foam or recycled plastic bins for durability. Foam sheets are lightweight and easy to cut 8.
Conclusion
A DIY robot costume is more than just a Halloween outfit—it’s a celebration of ingenuity and play. By repurposing everyday materials and adding personalized touches, you create not only a costume but also lasting memories. Whether you opt for a retro chrome bot or a glowing, tech-savvy mech, the key is to embrace the process and let creativity lead the way. As one parent noted, the pride on their child’s face when showcasing their handmade robot was worth every hot glue burn 89. So grab your boxes, fire up the glue gun, and prepare to wow the neighborhood with your one-of-a-kind creation!
Inspired by the creative minds at Paging Fun Mums, Crafts by Courtney, and Goodnight Fox. Happy crafting!